A Delmarvalous Way to Treasure the Shore
The sun is barely up, the tide is pulling back, and you’re walking the edge of the beach with a wicker basket swinging from your arm. The sand is cool under your feet, the air smells like salt and possibility, and then — there it is. A perfect shell, smooth as a whisper. A chunk of frosted sea glass the color of a shallow bay on a clear day. A shark tooth, small and dark and ancient-feeling in your palm. You pick it up. Obviously. You were never going to leave it there.
If you’ve spent any time beach-combing on the Delmarva Peninsula, you know exactly how this goes. The basket fills up. The pockets fill up. You start tucking things into your shoes and anywhere else that can hold your newly found treasures. You get home, set everything on the kitchen counter, and think: okay, but what do I actually do with all of this?
Here’s the thing about Delmarva’s coastline — it’s genuinely special. Between the wild Atlantic side with its barrier islands and the quieter, murkier treasures of the Chesapeake Bay shore, our beaches produce an incredible variety of finds. Smooth stones, fossilized shark teeth, coquina shells, sea glass in every shade of green and white (and if you’re lucky, that rare cobalt blue), bits of driftwood shaped by years of tides. It’s a peninsula full of natural art waiting to be made into something.
These five crafts are for everyone who has a jar, a box, a tote — or seven — of beach finds sitting around without a plan. They range from beginner-friendly afternoon projects to slightly more involved creations, and every single one will bring a little piece of the Shore into your everyday home. Let’s put those treasures to work.
We Want to Know:
What’s the most interesting thing you’ve ever found while beachcombing? Drop it in the comments — we love a good treasure story!

Before You Craft: A Quick Guide to Cleaning and Prepping Your Beach Finds
Before you break out the glue gun, a little prep work goes a long way. Properly cleaned and dried beach finds last longer, look better, and won’t introduce any unwanted smells (or bugs) into your home crafts.
Cleaning Shells
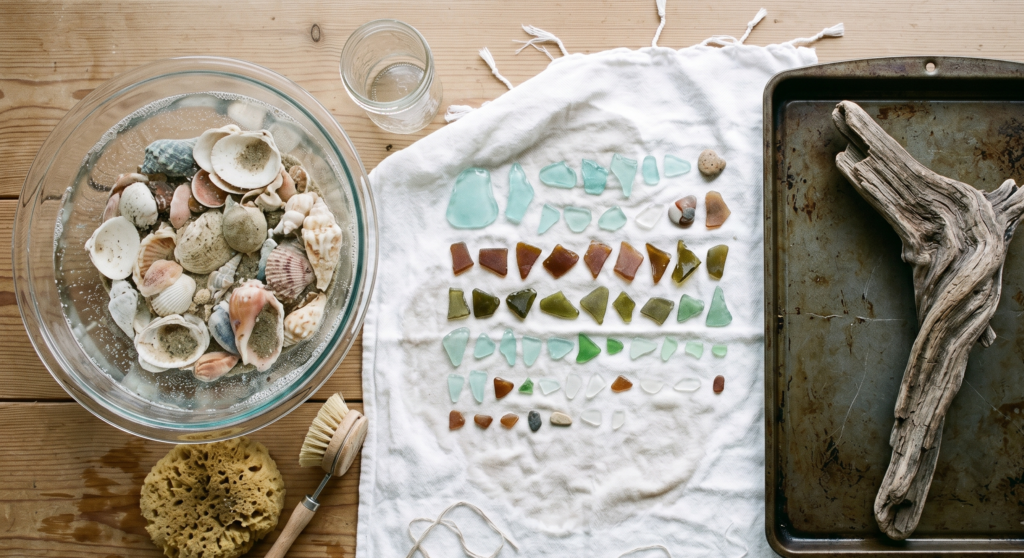
Soak shells in a solution of one part bleach to three parts water for about an hour. This removes odor, kills bacteria, and brightens the surface without damaging the shell. Rinse thoroughly, then let them dry completely — at least 24 hours — in the sun if possible. For shells with a natural sheen you want to preserve, a light rub of mineral oil after drying brings them right back to life.
Preparing Sea Glass
Sea glass usually just needs a good rinse and a dry. If you have a piece that feels rougher than you’d like for jewelry work, a very light pass with fine-grit sandpaper will smooth the edges. Sort your pieces by color and opacity — you’ll thank yourself later when you’re mid-project and need a specific shade.
Driftwood Care
Brush off any loose sand, then bake your driftwood on a foil-lined sheet at 250°F for about an hour. This kills any hitchhiking insects or bacteria without damaging the wood. Once cooled, you can leave it natural or seal it with a matte wood sealant to preserve the color and texture.
Shark Teeth and Stones
A simple rinse and thorough dry is all these need. For stones, a little food-safe mineral oil polished in with a soft cloth will make colors pop beautifully.
🐚 Know Before You Go:
If you’re collecting on Assateague Island National Seashore, be aware that removing live shells, live animals, or natural features is prohibited. Always collect responsibly — if it’s still alive, leave it to thrive. Dead shells, sea glass, and smooth stones are generally fair game on most public beaches, but it’s always worth a quick check on local regulations.
Craft #1: Driftwood Photo Display or Wall Hanging
Difficulty: Beginner-Friendly ⭐
Why This Craft Works
Driftwood from Delmarva’s coastline has incredible natural character. No two pieces are alike — some come in long, straight branches perfect for hanging, others are gnarled and sculptural. The best pieces tend to show up along the shores near Chincoteague, the Ocean City inlet areas, and the bay shores near Cambridge and Crisfield. Keep your eyes open and your trunk ready.
What You’ll Need
- One flat, relatively straight piece of driftwood
- Twine or thin leather cord
- Small binder clips or mini clothespins
- Strong craft adhesive (E6000 works great)
- Optional: small shells or sea glass for embellishment
- Matte wood sealant or Mod Podge
Step-by-Step
Seal your driftwood first with a light coat of matte Mod Podge or a non-toxic wood sealant — this locks in the color and keeps it from getting dusty over time. Let it dry completely. Tie a length of twine to each end of the driftwood for hanging, making sure it’s secure. Then space your binder clips or clothespins evenly along the bottom edge of the wood, attaching them with a dab of strong adhesive. Once dry, use those clips to hang small photos, postcards, or pieces of art. Finish by hot-gluing a few small shells or pieces of sea glass to the ends of the driftwood for a decorative touch.
This looks absolutely beautiful in a coastal-themed bedroom, a beach house entryway, or even a home office that needs a little shore energy. It’s also one of those crafts that looks far more complicated than it is — your guests will think you’re very impressive.
Would you hang this in your beach house or your year-round home? Tell us your vision in the comments!
Craft #2: Sea Glass Sun Catchers or Wind Chimes
Difficulty: Intermediate ⭐⭐
The Magic of Delmarva Sea Glass
Sea glass starts as broken bottles, old dishware, even pieces of shipwrecks — and then the ocean spends 20 to 40 years tumbling and frosting it into something beautiful. You’re literally holding decades of history when you pick up a piece. Delmarva beaches, especially on the bay side and near older fishing communities, can be surprisingly productive hunting grounds for sea glass collectors.
Sun Catcher Version
Wrap individual pieces of sea glass in copper jewelry wire, leaving a small loop at the top for hanging. Arrange several wrapped pieces on a length of wire or thin branch, spacing them at varying heights. Hang from a suction cup window hook and let the light do the rest. Color arrangement tip: group similar colors together for a more polished look, or mix them all up for a cheerful, eclectic feel. Rare red and orange pieces deserve a spot front and center.
Wind Chime Version
This one requires a diamond-tip drill bit set (available online for under $15 and absolutely worth it) to drill small holes in your sea glass pieces. String them on UV-resistant fishing line at different lengths, then tie the lines to a piece of driftwood as your crossbar. Hang outside on a porch and enjoy the soft, glassy sound every time the bay breeze comes through.
Have you ever found rare red or orange sea glass on a Delmarva beach? We’re genuinely jealous if so — share your find in the comments!

Craft #3: Shell and Resin Jewelry or Keepsake Trinket Dishes
Difficulty: Intermediate ⭐⭐
These two projects use the same basic materials and skill set, so we’re putting them together. Choose your adventure based on your patience level and how much jewelry you want to end up wearing.
Shell Resin Jewelry
Using silicone molds, UV resin or a beginner two-part epoxy kit, you can embed tiny shells, chips of sea glass, or even a single shark tooth into a pendant or earring. Pour a thin base layer of resin into your mold, arrange your finds, then cover with a final layer. Cure under a UV lamp (much faster than waiting for epoxy) and finish with jewelry hardware from any craft store. Imagine wearing a pendant that holds a piece of your favorite Delmarva morning walk — that’s the kind of jewelry worth making.
Trinket Dish (Beginner-Friendly Alternative)
Press shells and sea glass into a shallow silicone mold filled with air-dry clay. Let it dry completely, then seal the surface with a thin layer of resin or Mod Podge for a polished finish. These make beautiful little catch-alls for rings, earrings, or paperclips on a desk.
Safety note: Always work with resin in a well-ventilated space, wear gloves, and read your product instructions carefully. UV resin in small batches is generally the most beginner-friendly option.
If you’re hunting for shark teeth specifically, Bowers Beach in Delaware is worth a day trip — it’s known among local fossil hunters for turning up some impressive finds.
💡 New to resin? Start with a beginner UV resin kit — smaller batches, faster cure time, and much more forgiving for first-timers than two-part epoxy.
Craft #4: Coastal Candles with Embedded Shells and Sea Glass
Difficulty: Beginner-Friendly ⭐
What You’ll Need
- Soy or coconut wax flakes
- Fragrance oils (ocean breeze, sea salt and driftwood, bay cedar — all wonderful options)
- Cotton wicks and wick stickers
- Heat-safe glass jars or tins
- Shells and sea glass for decoration
Step-by-Step
Melt your wax according to package directions, add fragrance oil at the recommended temperature, then pour into your prepared jars. Here’s the key trick for the shell decoration: press clean, dry shells against the outside of a glass jar before pouring (they’ll show through the glass), or wait until your candle has cooled to a soft, slightly tacky surface and gently press shells and sea glass into the very top layer. Never fully embed shells inside the burning area of the wax — keep all decorative elements either outside the container or on the surface as non-burning accents.
For scent pairings, think about your specific Delmarva memories. A Bay Breeze or marsh grass scent for those golden Chesapeake evenings. Salt Air or ocean mist for Atlantic mornings on the beach. These candles make incredible hostess gifts or holiday presents — especially for friends and family who love the shore but don’t get to visit as often as they’d like.
What scent says “Delmarva” to you? Bay water and marsh grass? Sunscreen and salt air? Tell us your signature shore scent in the comments!

Craft #5: Framed Shell Art or Shadow Box Memory Display
Difficulty: Beginner ⭐ (shadow box) / Intermediate ⭐⭐ (patterned shell art)
Turning a Beach Walk into a Piece of Art
A shadow box becomes a visual diary of a specific trip or season. Label it with the beach name and date — “Assateague Island, August 2024” — and suddenly it’s not just a craft, it’s a keepsake. This is also a wonderful activity to do with kids after a beach trip. It channels the “I want to keep everything” impulse into something genuinely beautiful that can live on the wall instead of in a pile on the counter.
Simple Framed Shell Art
Arrange shells on canvas or heavy cardstock in patterns — a nautical star, a wave shape, or even a monogram letter. Adhere with strong craft glue and let dry completely. For a more polished look, paint the background in a solid color first and stick to a three-color shell palette.
Shadow Box Memory Display
Layer the back of a deep shadow box frame with a thin spread of fine sand (a little craft glue underneath keeps it in place). Arrange shells, sea glass, a small printed photo, a postcard, or even a pressed piece of sea lavender or beach grass. Add your handwritten label and hang it as part of a gallery wall.
